Quick bite: Creating a new recipe on Recipe Builder

Erudus is a powerful data platform with a range of business-improving tools and solutions, and though we’ve made it as user-friendly as possible, we know it’s important to have a resource for our customers to get answers to their questions and learn how to use Erudus to it’s full advantage. Enter Knowledge Base, the user manual in which you can learn everything you’ll conceivably ever need to know about using Erudus.
So far we’ve covered:
- Adding a local code to a product
- Adding an Internal or Customer User to Your Wholesaler Account
- Adding a product
- Amending or editing a product
- Confirming your product data
- Copying a Product Specification
- Creating a Product Visibility Report
- Downloading all of your product specifications as a CSV file
- Finding Products With Allergen & Nutritional Data Search
- How to reset your password
- Interpreting CSV downloads
- Logging into Erudus for the first time
- Managing your Erudus email subscriptions
- Manufacturer Product Tour
- Managing uploaded images
- Removing a product
- Searching for a Product Image Uploading Purchase History For Customers
- Updating your Supplier profile details
- Uploading a Range List to Match Local Codes to Products
- Uploading images to Image Hub
- Uploading or adding an accreditation or certificates
- Uploading Purchase History For Customers
- Using the Query Builder
This time we're turning our attention to “Creating a new recipe on Recipe Builder”.
This is a guide on how to create a new recipe using the recipe builder tool. There is a video guide above navigating around the recipe builder tool or see below for a step-by-step guide.
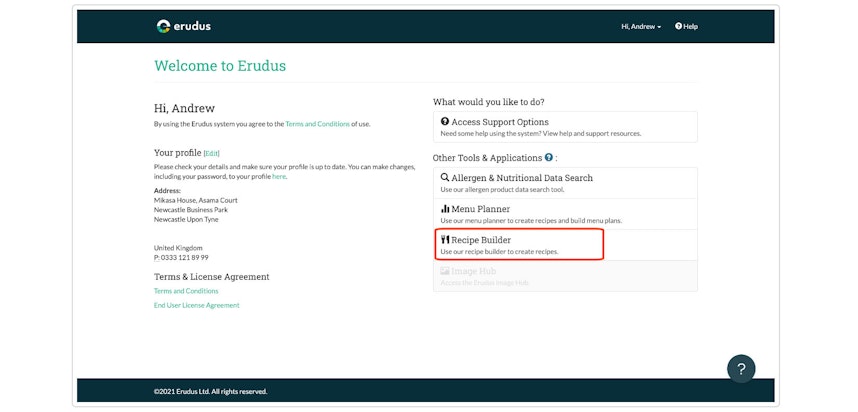
Step 1 - Access the Recipe Builder
Click the "Recipe Builder" button on the User Dashboard.
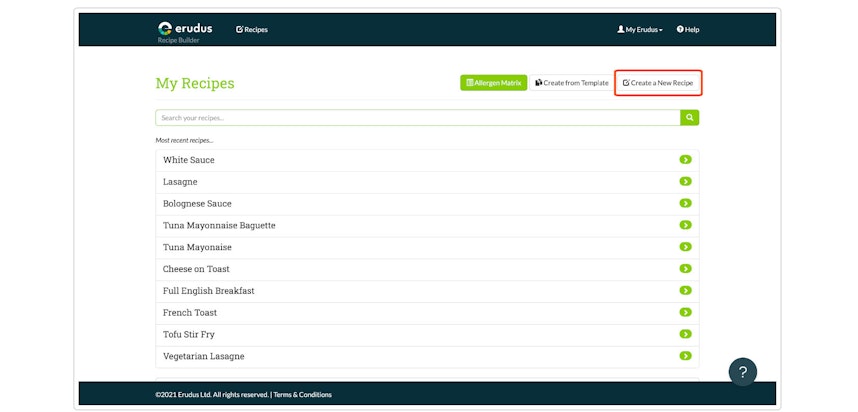
Step 2 - Create a new recipe
Click "Create a new recipe". Both the Nutritional Calculator and Recipe Builder options are shown below.
Step 3 - Add your ingredients
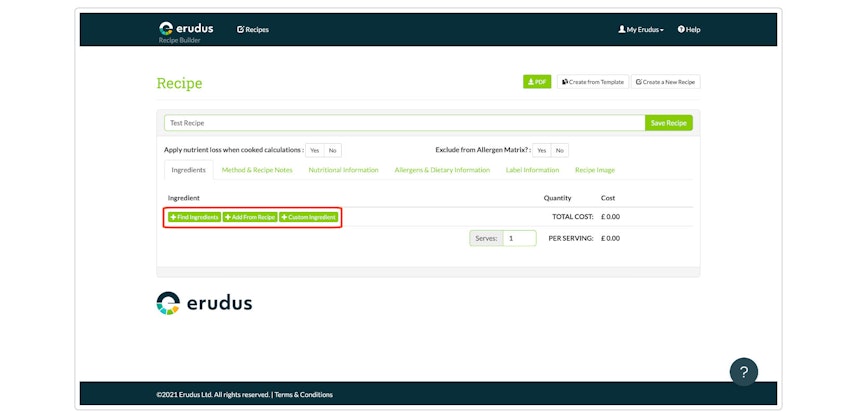
Use the buttons at the bottom of the ingredients list to start adding ingredients to your recipe.
For more information on adding ingredients, see the following guides:
Step 4 - Name your recipe
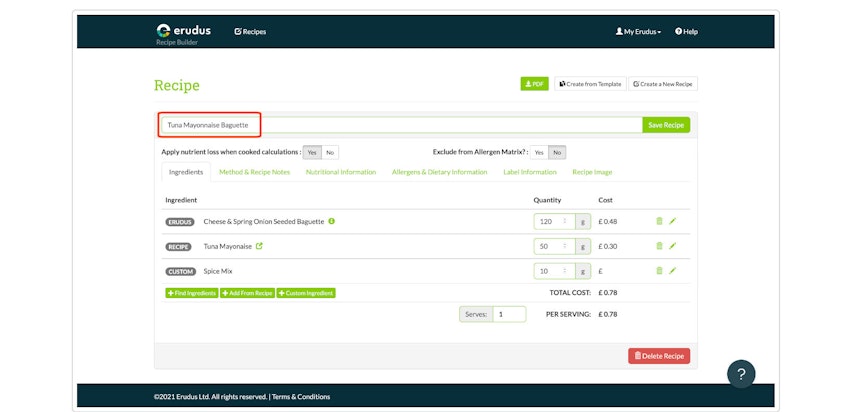
Name your recipe in the selected box at the top of the screen.
Step 5 - Add method and recipe notes, view nutritional & allergen data, generate ingredients labels and add images
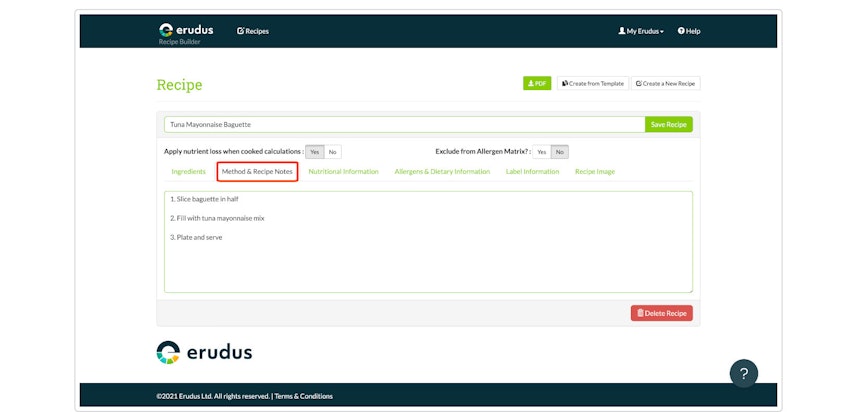
Click the method & recipe notes tab and add any notes or a method for your recipe.
Ensure you click the save button once this is completed.
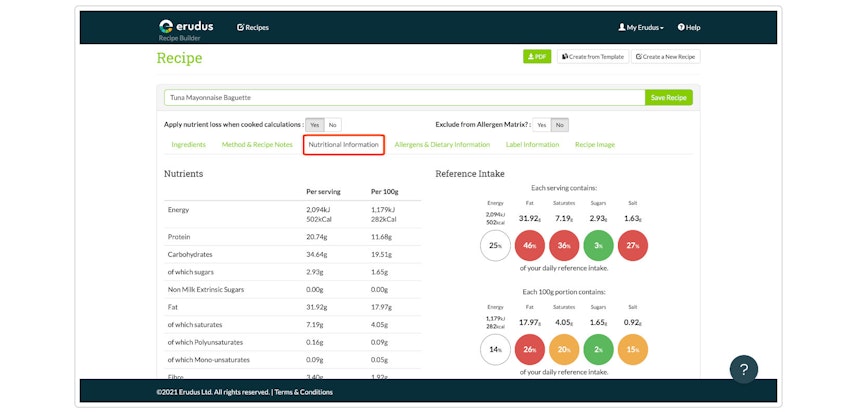
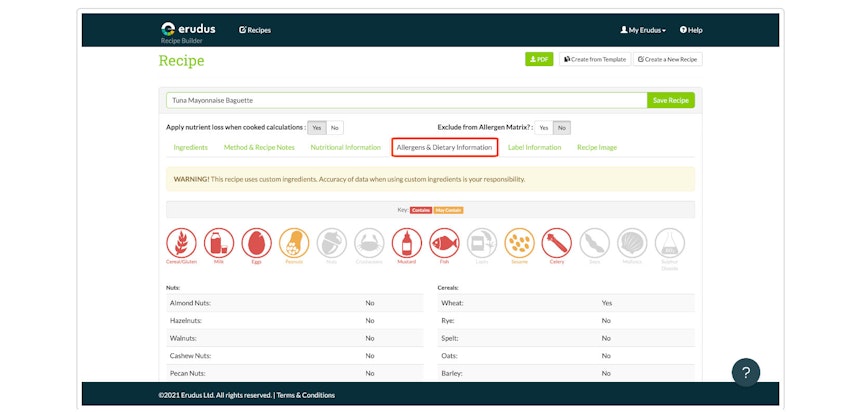
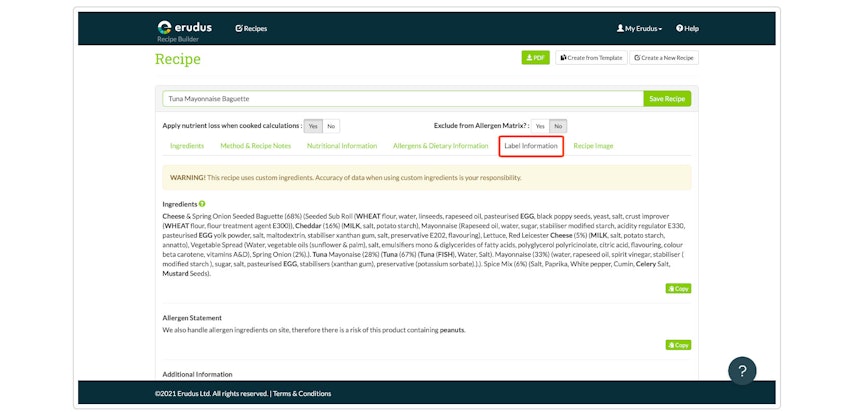
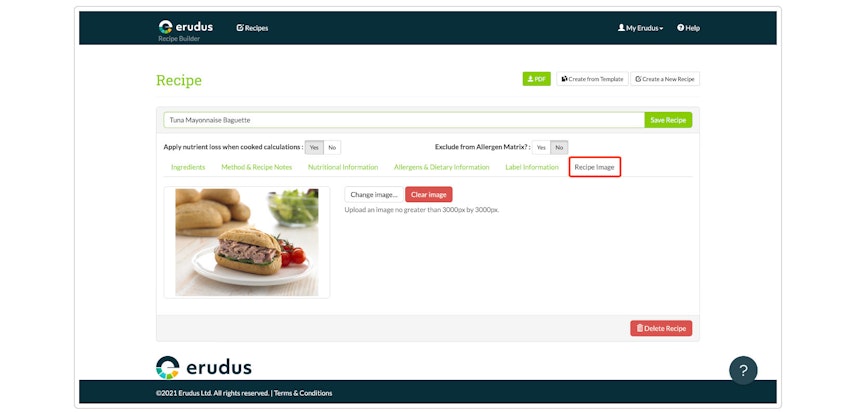
You can view the nutritional information, allergen and dietary information, generate ingredients labels and add images using the tabs shown below.
From this point, your recipe is now complete, to download the recipe as a PDF continue to step 6, otherwise, go to step 8.
Step 6 - Download your PDF
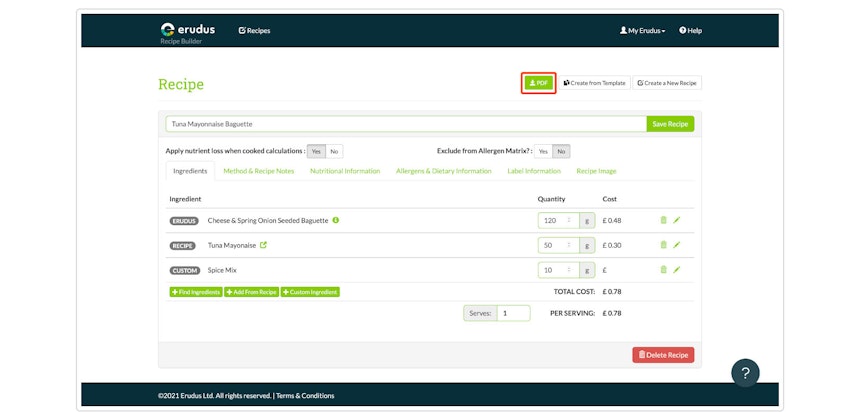
To download a PDF version of your recipe specification, click the 'Download PDF' button.
You may also be interested in…


You may also be interested in…
Quick bite: Uploading Purchase History For Customers
ReadYou may also be interested in…


You may also be interested in…
