Quick Bite: Uploading images to Image Hub

Erudus is a powerful data platform with a range of business-improving tools and solutions, and though we’ve made it as user-friendly as possible, we know it’s important to have a resource for our customers to get answers to their questions and learn how to use Erudus to it’s full advantage. Enter Knowledge Base, the user manual in which you can learn everything you’ll conceivably ever need to know about using Erudus.
So far we’ve covered:
- Logging into Erudus for the first time
- How to reset your password
- Adding a product
- Adding a local code to a product
- Amending or editing a product
- Managing your Erudus email subscriptions
- Removing a product
- Confirming your product data
- Manufacturer Product Tour
- Interpreting CSV downloads
- Updating your Supplier profile details
- Creating a Product Visibility Report
- Uploading a Range List to Match Local Codes to Products
- Adding an Internal or Customer User to Your Wholesaler Account
- Copying a Product Specification
This time we're turning our attention to “Uploading images to Image Hub”.
IMPORTANT NOTE: Uploading images to Image Hub is limited to 30 images at a time.
Step 1
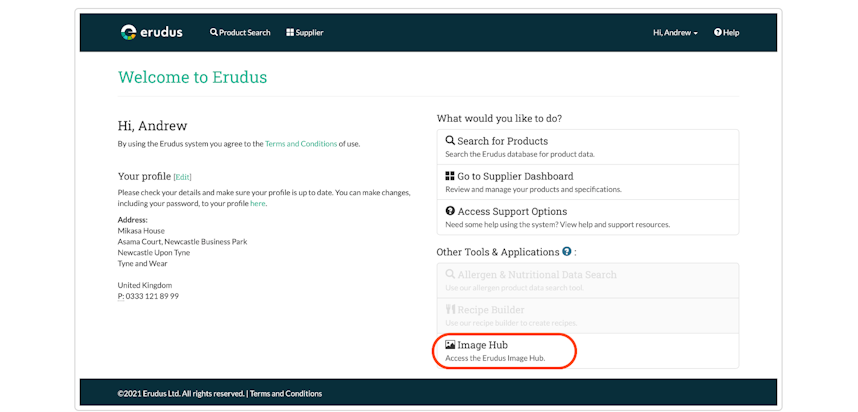
Click on the Image Hub Button on the user dashboard.
Step 2
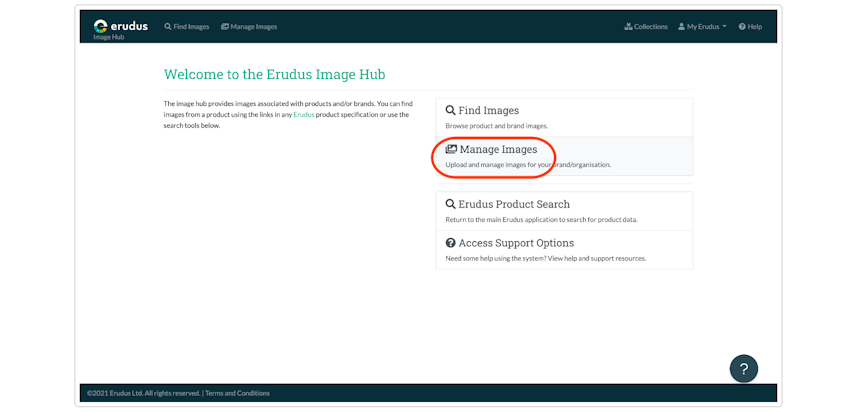
From the Image Hub dashboard, click the "Manage Images" button.
Step 3
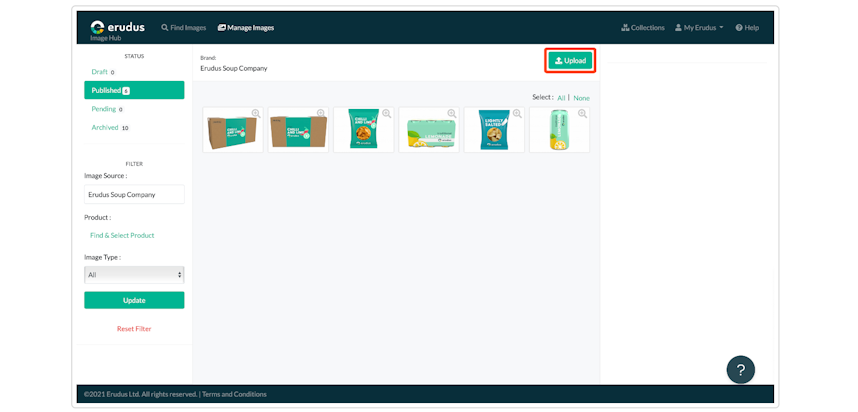
You will be taken to the image management dashboard. From there, click the blue "Upload" button at the top of the screen. This will open up the image upload window.
Step 4
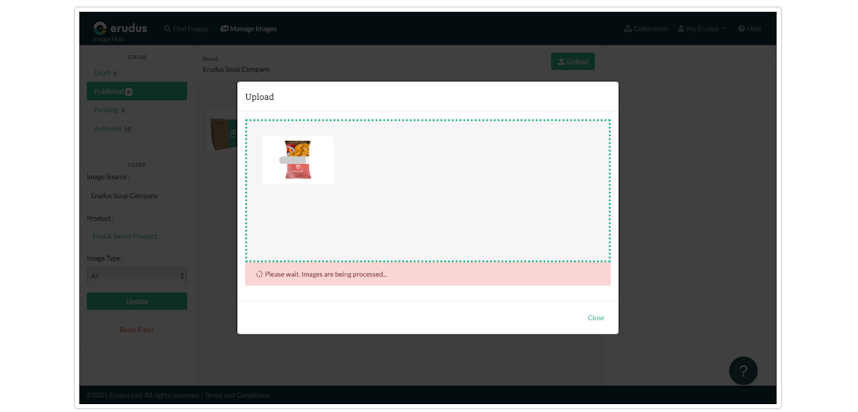
Either drag the image files you wish to upload into the upload window, or click on the window to select files that are saved on your computer.
Step 5
The images will be uploaded to the Image Hub and you will receive a notification when complete while detailing any unsuccessful uploads and the reasons why.
Step 6
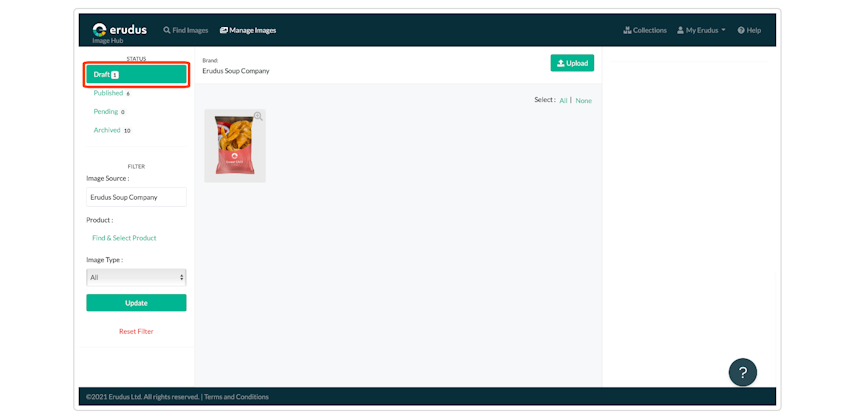
Newly uploaded images will automatically be saved in the "Drafts" section of the image management dashboard.
You may also be interested in…


You may also be interested in…

