Quick Bite: Uploading a Range List to Match Local Codes to Products

Erudus is a powerful data platform with a range of business-improving tools and solutions, and though we’ve made it as user-friendly as possible, we know it’s important to have a resource for our customers to get answers to their questions and learn how to use Erudus to it’s full advantage. Enter Knowledge Base, the user manual in which you can learn everything you’ll conceivably ever need to know about using Erudus.
And we’re here to show you the sort of information you can find on there, and help you get to grips with everything Erudus.
So far we’ve covered:
- Logging into Erudus for the first time
- How to reset your password
- Adding a product
- Adding a local code to a product
- Amending or editing a product
- Managing your Erudus email subscriptions
- Removing a product
- Confirming your product data
- Manufacturer Product Tour
- Interpreting CSV downloads
- Updating your Supplier profile details
- Creating a Product Visibility Report
This time we're turning our attention to “Uploading a Range List to Match Local Codes to Products”.
This article shows you how to upload your product or range list with local codes to automatically add local codes to multiple products at once. In order to do this, you MUST have the TRADE GTIN/BARCODE and LOCAL CODE on a range or product list.
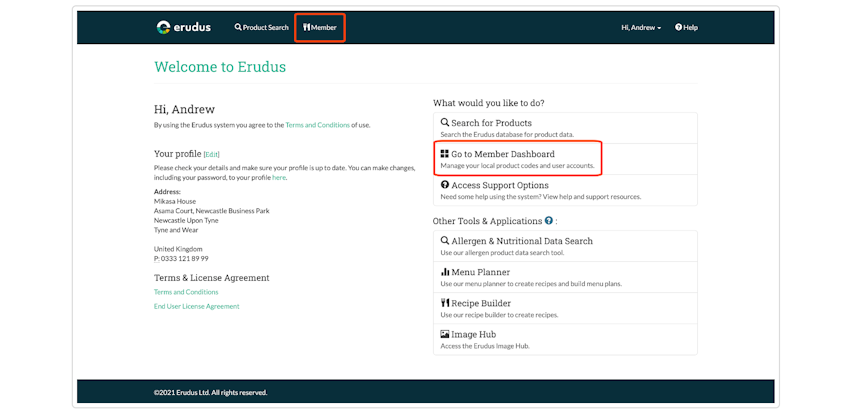
Step 1 - Access Your Member Dashboard
Click the Member Dashboard button from the user dashboard.
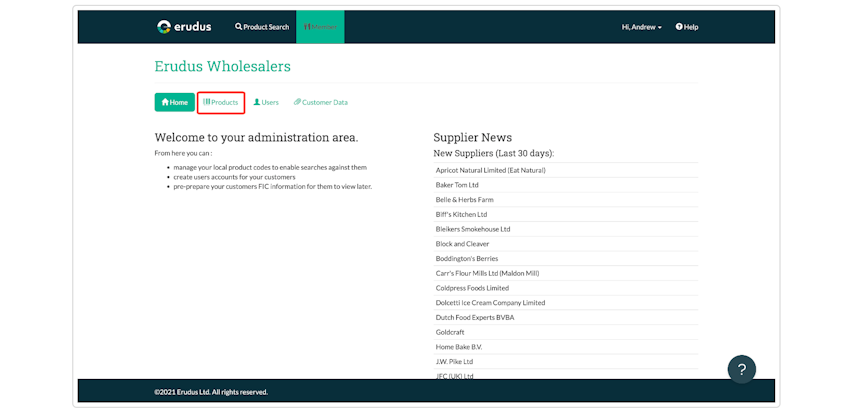
Step 2 - Access Your Product List
From your Member Dashboard, you can click on the "Products" button to display any local codes you have added to products in the Erudus database.
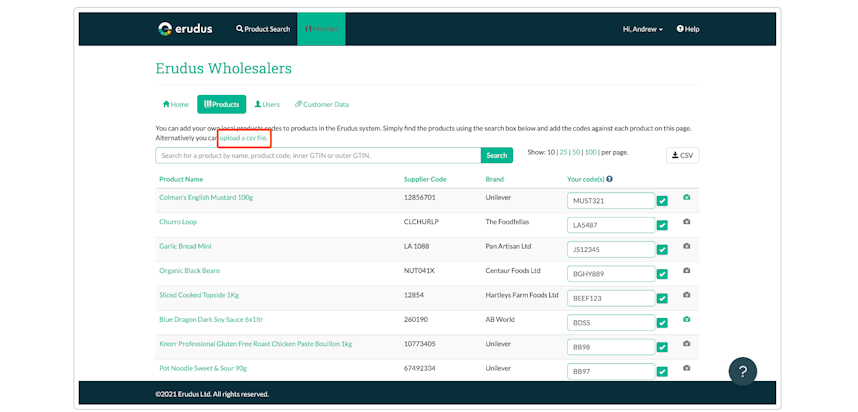
Step 3 - Upload a CSV file
To access the matching tool to upload your local codes click the link titled 'upload a CSV file' highlighted below.
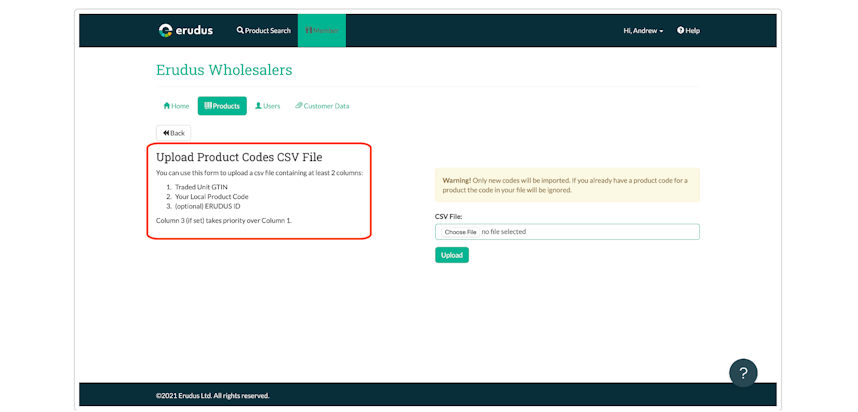
Step 4 - CSV file layout
This is the screen where you will upload your file to do the code matching, you need to do is ensure that the file you are about to upload is in the correct format and is arranged in the correct way.
The format and arrangement are detailed below.
Step 5 - Your product list
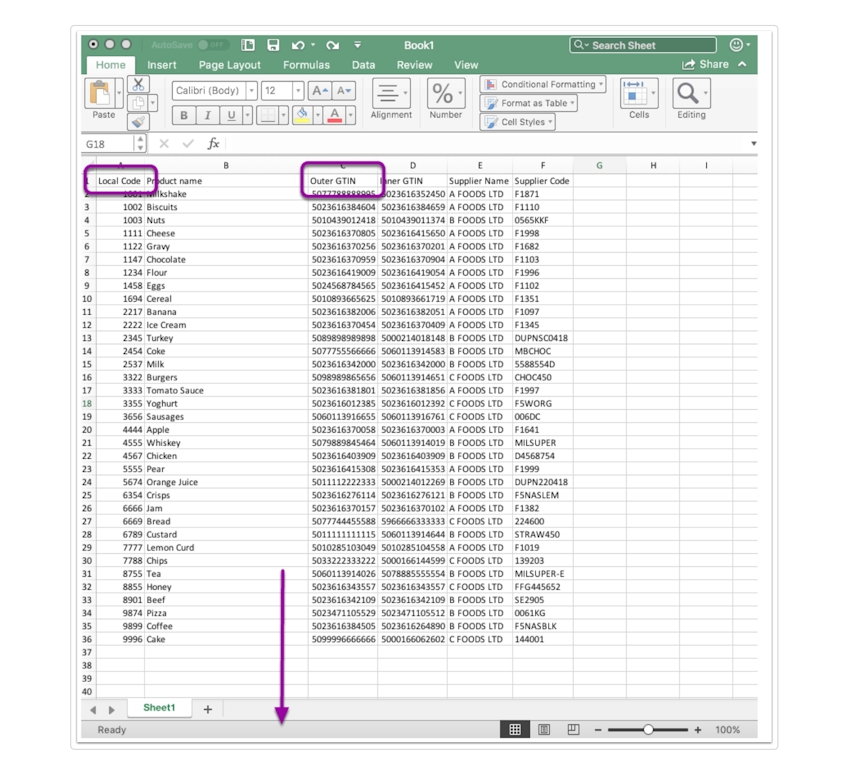
Below is an example of a product list, the only data you need on this in order to match local codes is the trade-unit (or outer) GTIN/barcode and the local code.
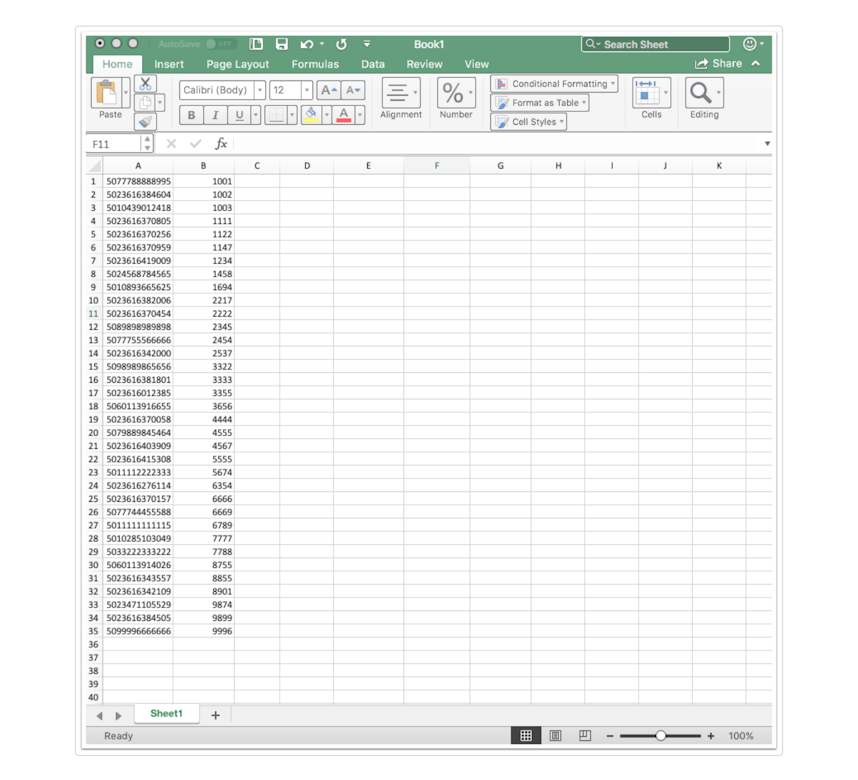
These two columns are shown below, the others need to be deleted before saving the file as this data is not needed.
Step 6 - Save file as .csv
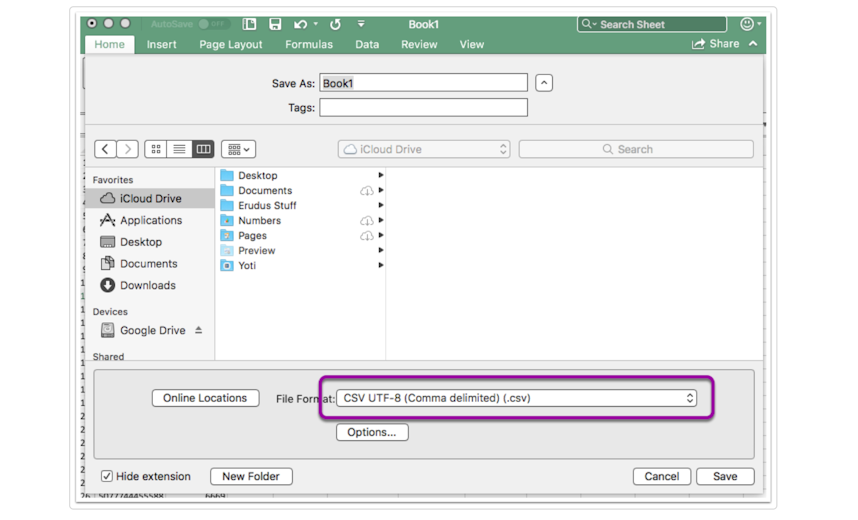
The next step is to save the file as a CSV file.
To do this click 'file' and 'save as' you then need to ensure that the file format is selected as CSV (shown below) and save the file in the desired location ready for upload.
Step 7 - Upload your file
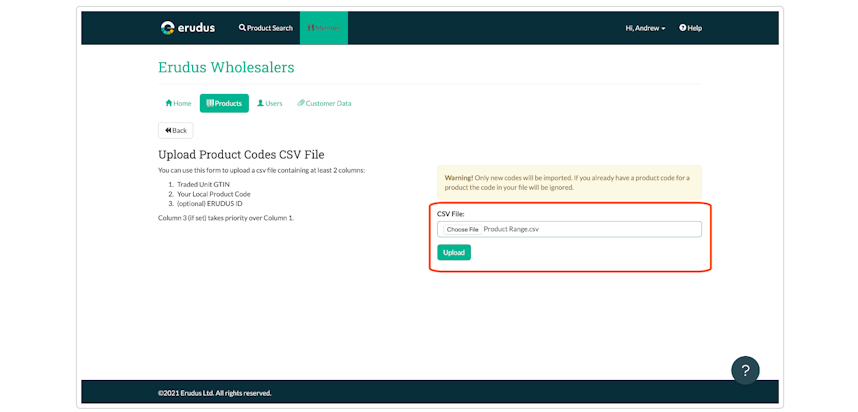
Upload the file using the 'choose file' button and select the CSV file you saved in Step 6.
Once this is selected click the upload button.
Step 8 - Results of product matching
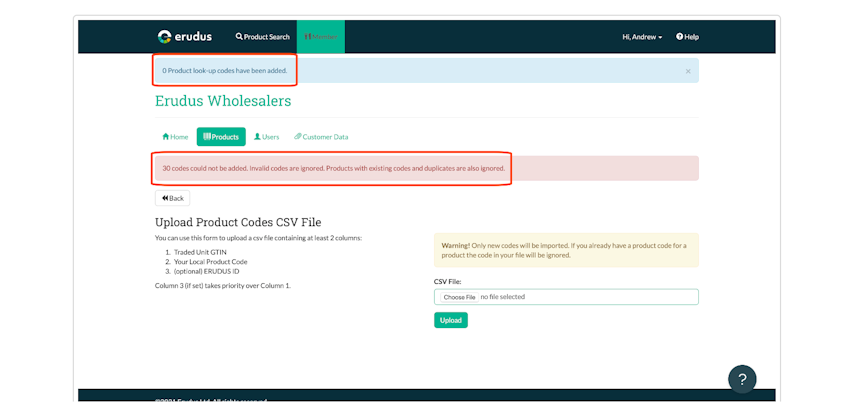
Your screen will now display any local codes which it managed to match as well as any it didn't.
Depending on which barcode or GTIN has been attached to the product it sometimes can have trouble matching up. Matching can also fail if the product in question isn't listed on Erudus. We are working to reduce this gap in products and you can help by emailing your product or range list to support@erudus.com.
In the below screenshot you can see the messages displayed.
Step 9 - Viewing matched local codes
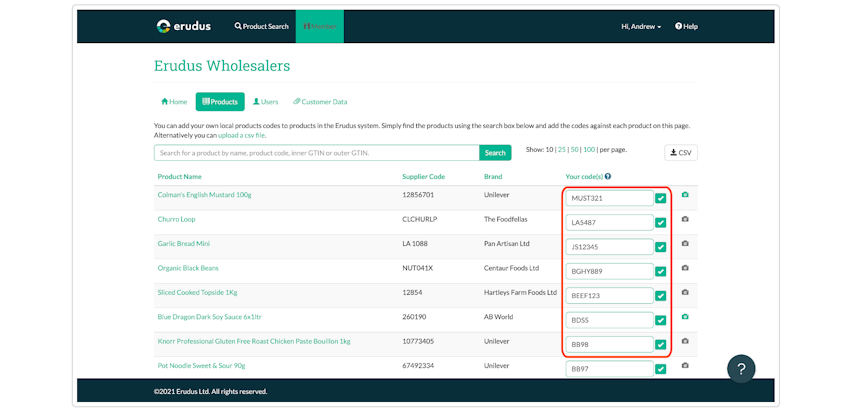
By moving back to the products screen you can now see any codes which have been matched.
The local codes are displayed on the right-hand side of the screen as shown below.
You may also be interested in…


You may also be interested in…
Quick Bite: Creating a Product Visibility Report
ReadYou may also be interested in…


You may also be interested in…

