Quick bite: Uploading Purchase History For Customers

Erudus is a powerful data platform with a range of business-improving tools and solutions, and though we’ve made it as user-friendly as possible, we know it’s important to have a resource for our customers to get answers to their questions and learn how to use Erudus to it’s full advantage. Enter Knowledge Base, the user manual in which you can learn everything you’ll conceivably ever need to know about using Erudus.
So far we’ve covered:
- Adding a local code to a product
- Adding an Internal or Customer User to Your Wholesaler Account
- Adding a product
- Amending or editing a product
- Confirming your product data
- Copying a Product Specification
- Creating a Product Visibility Report
- Downloading all of your product specifications as a CSV file
- Finding Products With Allergen & Nutritional Data Search
- How to reset your password
- Interpreting CSV downloads
- Logging into Erudus for the first time
- Managing your Erudus email subscriptions
- Manufacturer Product Tour
- Managing uploaded images
- Removing a product
- Searching for a Product Image Uploading Purchase History For Customers
- Updating your Supplier profile details
- Uploading a Range List to Match Local Codes to Products
- Uploading images to Image Hub
- Uploading or adding an accreditation or certificates
- Using the Query Builder
This time we're turning our attention to “Uploading Purchase History For Customers”.
This guide will show you how to upload any purchase history for your customer accounts.
Before following this guide please ensure that you have added the "Customer Reference" to the correct user as shown in Step 3 of the "Adding a User to Your Wholesaler Account" so your customer can access their data.
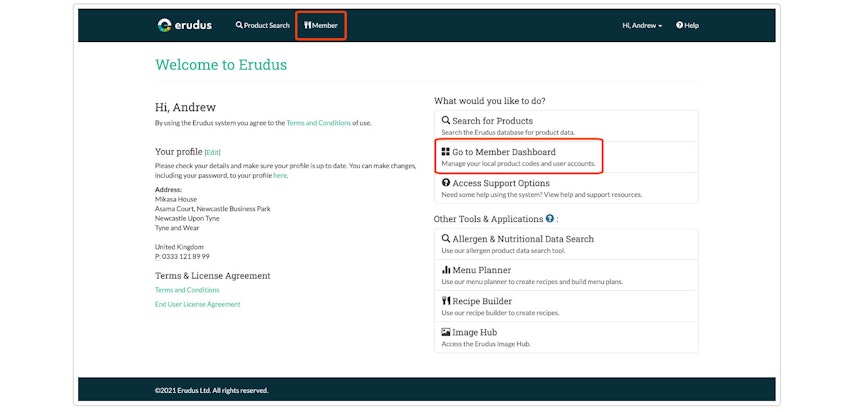
Step 1 - Access your Member Dashboard
Click the “Member Dashboard” button to access your member dashboard.
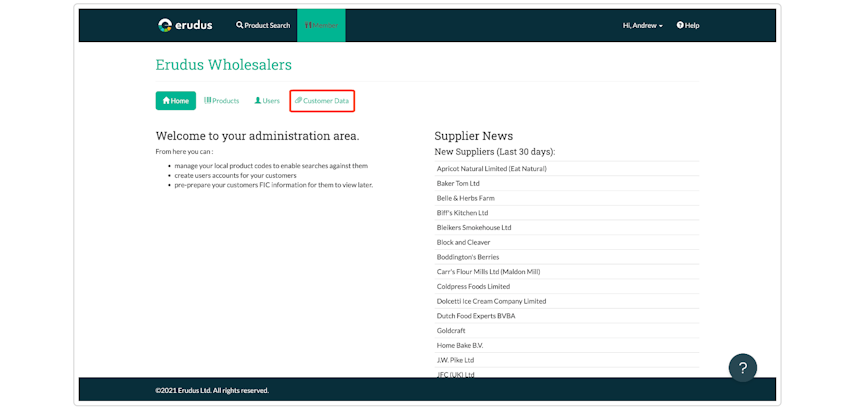
Step 2 - Access customer data section
Click the "Customer Data” button to access the customer purchase history manager.
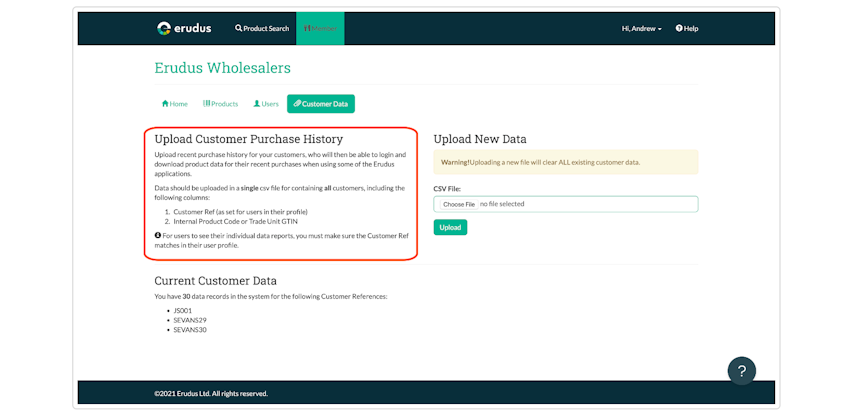
Step 3 - Identify Layout for Upload
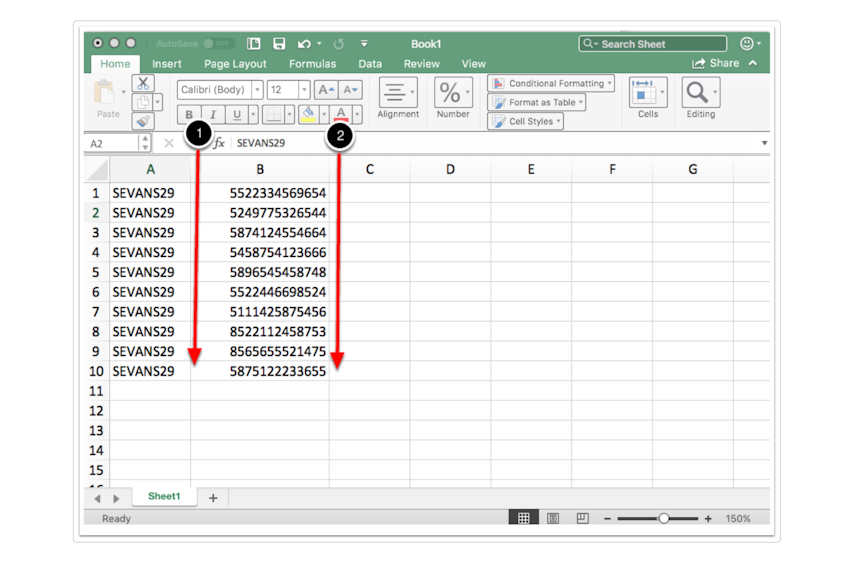
In order to upload your customer purchase history, you need to create a CSV file with the data on it. The highlighted section shows you how it needs to be arranged ready for upload.
You will need both the customer reference number and internal product codes or GTIN of the products.
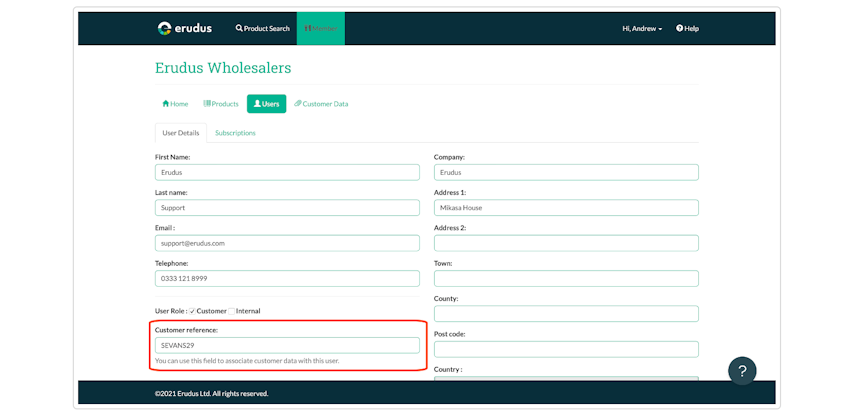
Step 4 - Locate customer reference
This reference can be found on the user screen in the customer details section of the user.
See “Adding a User to Your Wholesaler Account”guide for details of how to set this user up on Eurdus and assign them a customer reference.
Step 5 - Arrange your data
As shown in step 3, the data needs to be arranged in 2 columns:
- 1 - Column A - Customer reference number (this is repeated for multiple products)
- 2 - Column B - GTIN or local code of the product.
Multiple customer reference numbers can be uploaded at once. However, in the example, only one is shown.
Step 6 - Save your file
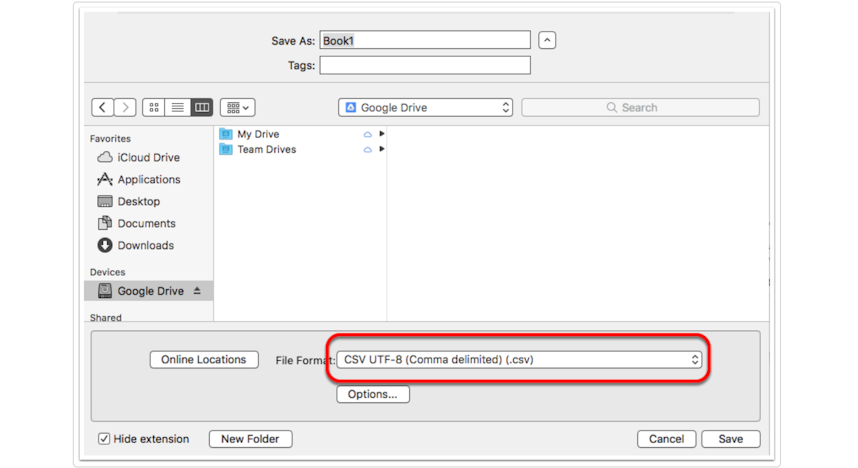
Once the data is arranged correctly the file needs to be saved.
Please note the file requires saving in CSV format for the upload.
Step 7 - Upload the file
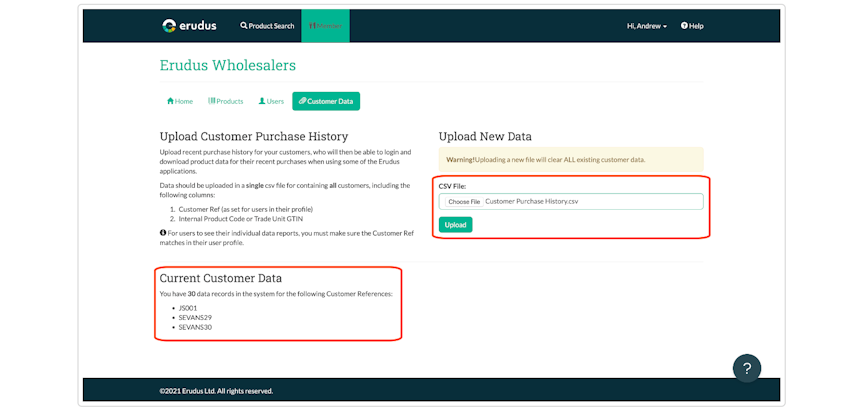
Select the file to upload on the right side of the screen and click upload. Once uploaded, confirmation is shown by customer reference and data records under the current customer data heading.
This will now allow your customers to download their purchase history when accessing their Erudus account.
Step 8 - Your customer viewing the data
Once you have uploaded the purchase history, your customer will be able to view the records on the “purchased” screen.
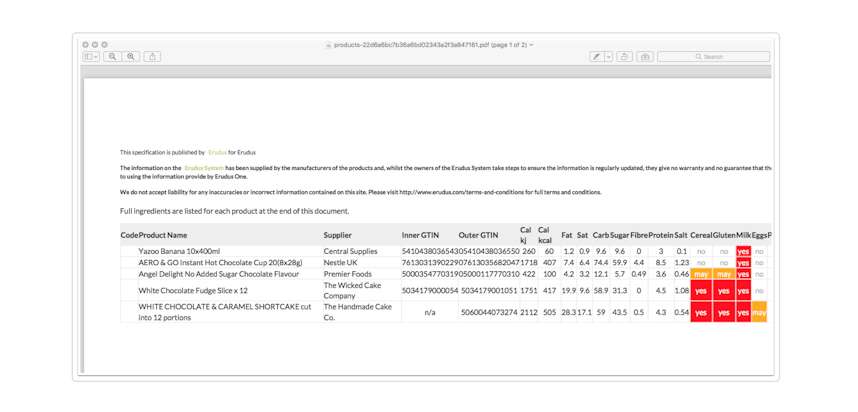
This is available to download either in PDF or CSV format as shown below.
You can send your customers this link to the guide on “Downloading Your Purchase History” so they can see how to download this data.
Below is an example of the data downloaded as a PDF for your customers.
You may also be interested in…


You may also be interested in…
Quick Bite: Adding an Internal or Customer User to Your Wholesaler Account
ReadYou may also be interested in…


You may also be interested in…
Quick bite: Downloading all of your product specifications as a CSV File
ReadYou may also be interested in…


You may also be interested in…


