Quick Bite: Adding a local code to a product

Erudus is a powerful data platform with a range of business-improving tools and solutions, and though we’ve made it as user-friendly as possible, we know it’s important to have a resource for our customers to get answers to their questions and learn how to use Erudus to it’s full advantage. Enter Knowledge Base, the user manual in which you can learn everything you’ll conceivably ever need to know about using Erudus.
And we’re here to show you the sort of information you can find on there, and help you get to grips with everything Erudus. We started at the beginning, with “Logging into Erudus for the first time”, then looked at the ever popular “How to reset your password” and ”Adding a product”.
This time we're turning our attention to the very handy “Adding a local code to a product”.
So, to add your own local or wholesaler code to one of your products on Erudus follow the below instructions:
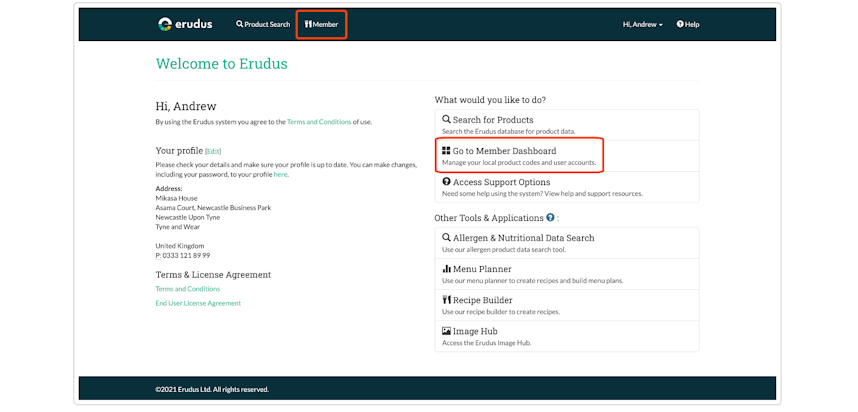
Step 1 - Access the Member Dashboard
Click on the Member Dashboard button from the User Dashboard.
Step 2 - Access the Product Manager
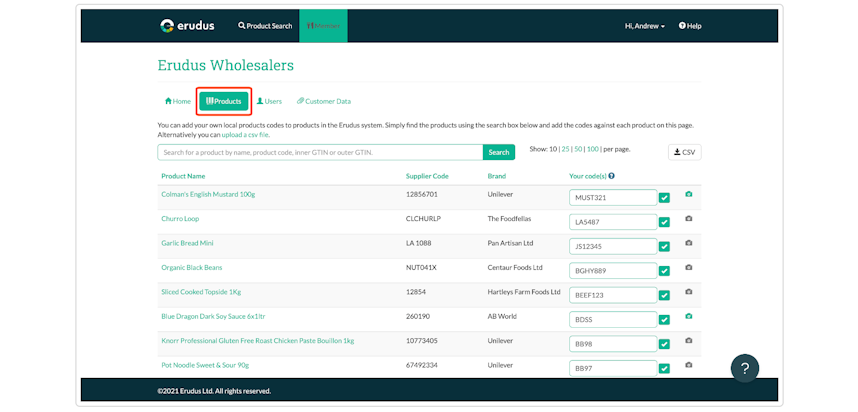
Clicking on the "Products" button from the Member Dashboard will show you all of your products on the Erudus system.
Step 3 - Find the product
Using the search bar find the product you wish to add the local code to by searching the product name, Erudus ID, supplier code or by using the inner or outer GTIN.
Step 4 - Complete local code for product
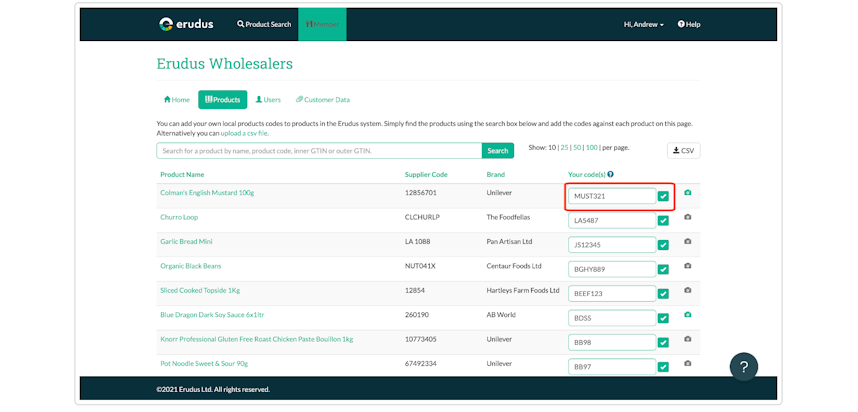
Type in your local code into the 'Your Code' box then confirm the action by clicking the green tick symbol to save this local code to this product. If you need to add more than one local code to the product you can do this by separating them with a comma (as shown in the image).
You may also be interested in…


You may also be interested in…
Quick Bite: Resetting your password
ReadYou may also be interested in…
You may also be interested in…


