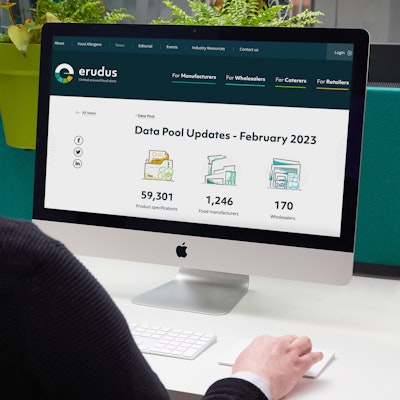
Quick Bite: Adding a product

Erudus is a powerful data platform with a range of business-improving tools and solutions, and though we’ve made it as user-friendly as possible, we know it’s important to have a resource for our customers to get answers to their questions and learn how to use Erudus to it’s full advantage. Enter Knowledge Base, the user manual in which you can learn everything you’ll conceivably ever need to know about using Erudus.
And we’re here to show you the sort of information you can find on there, and help you get to grips with everything Erudus. We started at the beginning, with “Logging into Erudus for the first time”, then looked at the ever popular “How to reset your password”.
Now we’re focusing on another staple,”Adding a product”...
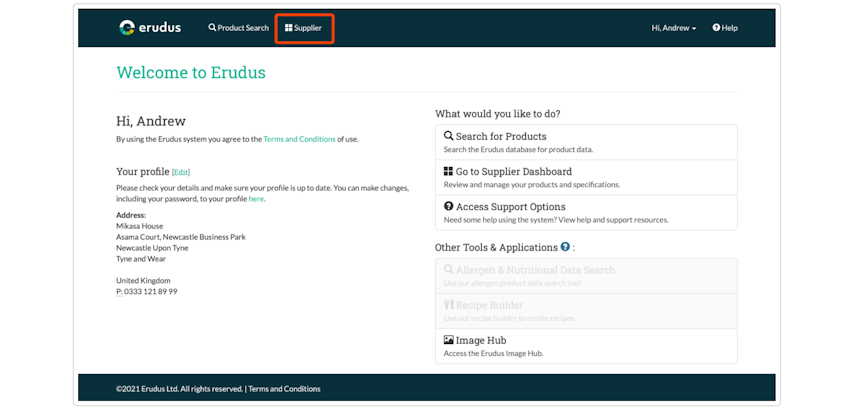
Step 1 - Access your supplier dashboard
Click the "Supplier" button at the top of the screen to access your supplier dashboard.
Step 2 - Access the products menu
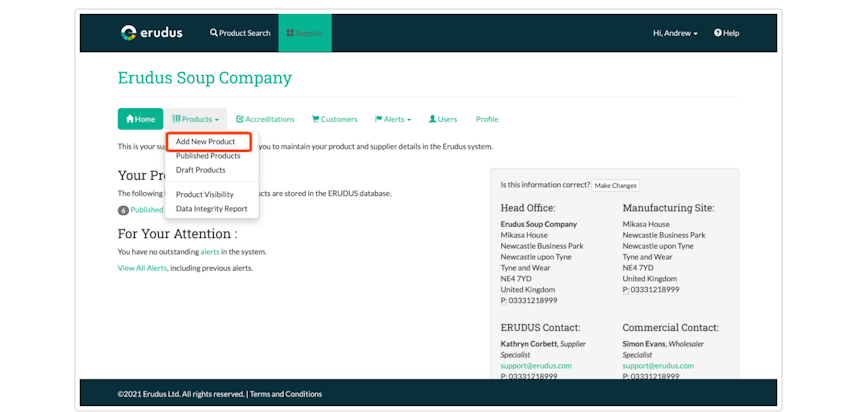
Click the products drop down menu then select 'Add New Product'.
Step 3 - Create a new product
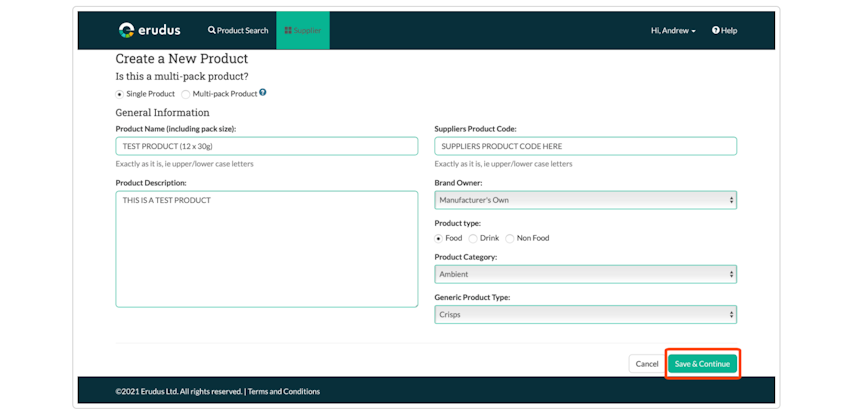
Below is the first screen in creating a new product.
Every field needs to be filled in to be able to progress to the next screen. Each field on this screen relates to the name, branding and category you want your product to be associated with.
Once these have been filled in click Save & Continue at the bottom of the screen.
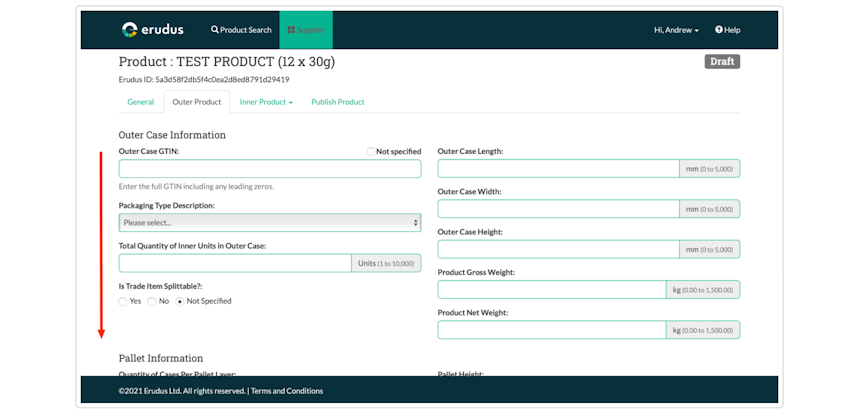
Step 4 - Outer product specification
Similar to the previous screen each field needs to be completed to progress to the next screen.
These fields relate to the 'outer product' or the case which the product is shipped in. Information needed for this will include barcodes and dimensions for the outer product, pallet information, logistical information as well as any waste packaging information.
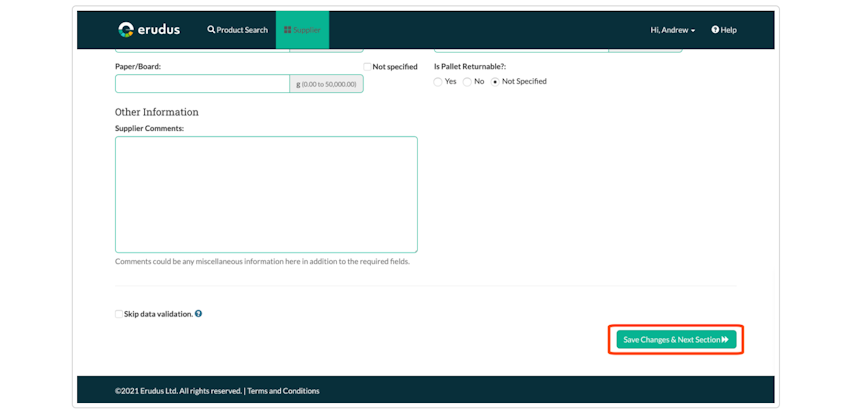
Once completed scroll to the bottom and click Save Changes & Next section.
Step 5 - Inner product specification
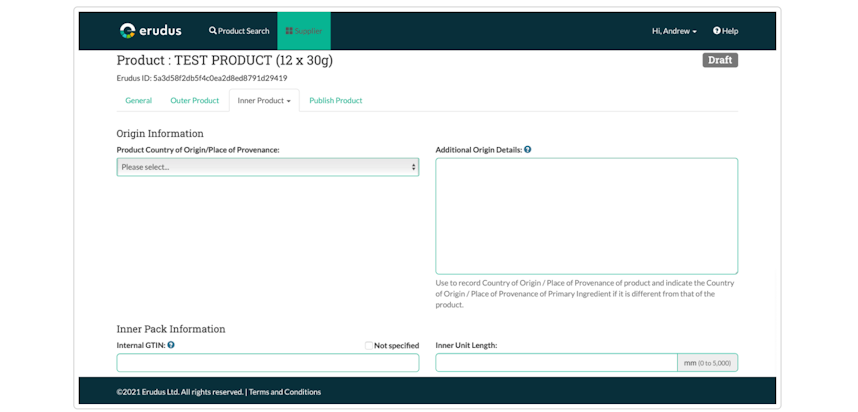
Similar to each screen so far all the details need to be filled in to be able to save and progress to the next screen.
The inner product information screen is the largest information screen to fill in when creating a product. This will contain the product barcode and sizing, allergen information, nutrition information, packaging and any accreditation certificates the product has. If no accreditation has been uploaded see our guide on 'Adding/Deleting an Accreditation or Certificate'.
Once these have been filled in, scroll to the bottom of the screen and click Save Changes & Next section.
Step 6 - Microbiological testing data
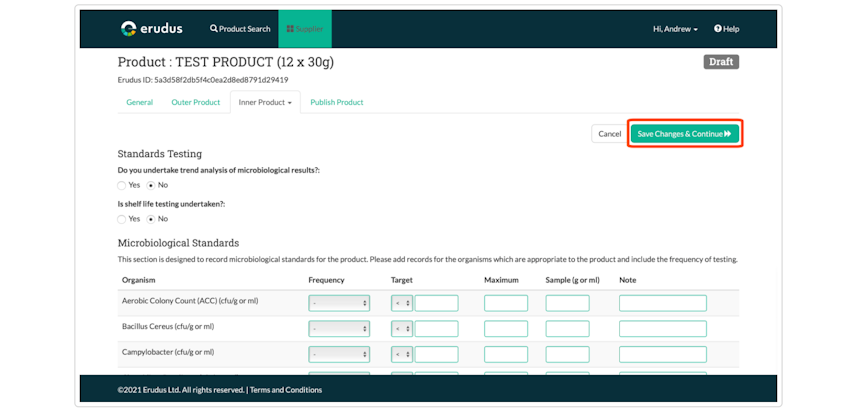
If your supplier conducts any microbiological testing on the products this is the screen where this data can be entered to share with Erudus users.
First, click the 'Yes' option where it asks if trend analysis is undertaken (highlighted in the below image) then use the drop-down boxes and fields to enter the results data which has been tested for. Once completed, click the save changes & continue option at either the top or bottom of the screen.
If your supplier doesn't conduct any microbiological testing 'No' can be left selected and click Save Changes & Continue (1) located at either the top or bottom of the screen.
Step 7 - Confirm and publish the product
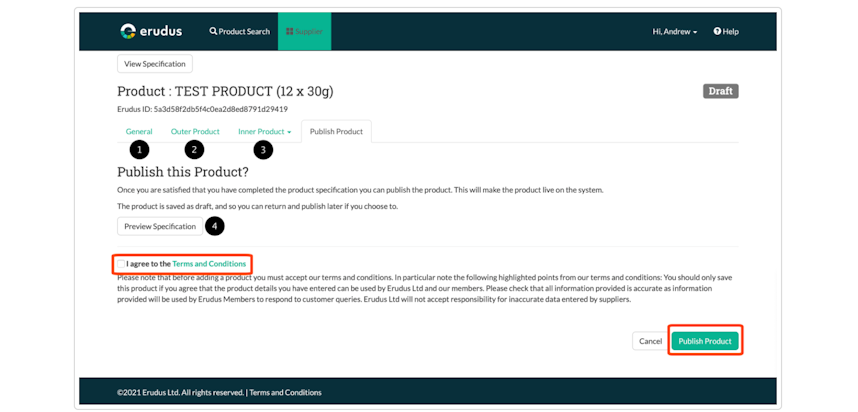
This is the final confirmation screen before publishing the product on Erudus. From this screen, you can go back to any of the previous screens to alter the general (1), outer product (2) or inner product (3) by clicking the tabs as shown. You can preview your listing by clicking the preview specification button (4) to view what the entry will look like.
Once you have confirmed all of the information is correct the terms and conditions need to be agreed to and then click publish product at the bottom right-hand side of the screen.
NOTE - At any point during the creating of a product if you click the cancel button located at the bottom of the screen, the product will be saved into the draft products section, this will allow you to come back and continue creating the product at a later date. As shown in step 8.
Step 8 - Draft products
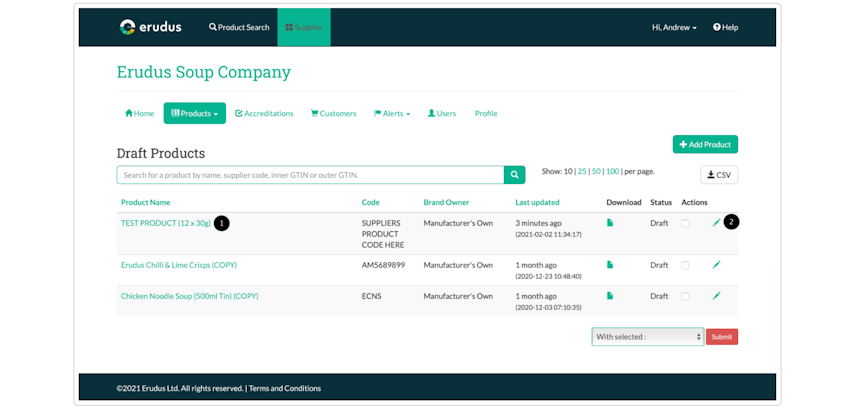
Below is the draft products screen, this can be accessed from the drop-down products menu shown in step 2.
The product can be viewed or previewed by clicking the products name (1) or can be edited ready for publishing by clicking the pencil icon on the right-hand side (2).
You may also be interested in…


You may also be interested in…
Quick Bite: Resetting your password
ReadYou may also be interested in…
You may also be interested in…

